Archiving – it doesn’t exactly sound like a fun weekend activity, does it?
But unfortunately our mailboxes can’t always deal with too many e-mails, especially those with large attachments, we receive regularly. Unless you clean up your mailbox and delete e-mails frequently, you’ll run out of mailbox space sooner than you think. This is where archiving comes in handy.
In this article we will show you how easy it is to create and maintain archives on your computer.
- HOW TO CREATE YOUR ARCHIVE FILE

Open MS Outlook
- Select the Home tab
- Use the dropdown menu next to New Items
- Click on More Items
- Select Outlook data file

This will create the file for your new archive.
Important:
- Please name it properly as to prevent confusion when creating new archives later on.
- Please do not put a password on the archive file as this causes confusion and mail loss at the end of the day when you get a new computer or if the case may be that data recovery must be done.
This also must be under “My Documents\Outlook Files”.
When clicking on OK you will return to your Outlook Home screen.
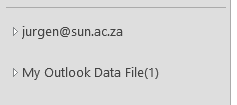
As shown below (when the mailbox is collapsed) you will be able to see your new Outlook archive.
2. NOW FOR THE ARCHIVING
Click on File in the left top corner
Under Info you will find Cleanup Tools
When clicking on the button you will find Archive as the third option.

The next window you will be presented with is seen below.
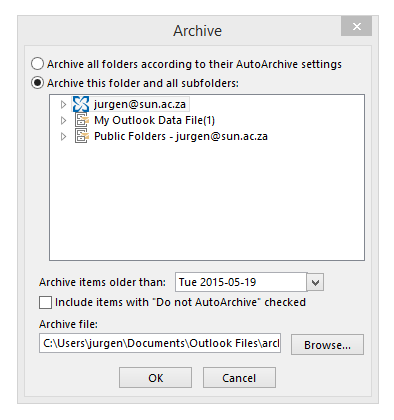
The most important thing you need to do now is check that the correct archive file will be used for archiving.
To check this you need to click on the browse button and make sure it is pointing to the correct file in “My Documents\Outlook Files”.
Secondly:
- Choose a date – all e-mails before the input date will be archived to your folder. This may take a while if you have not archived before.
Thirdly:
- Select your mailbox (not only parts of it, but the Collapsed view as seen in the screenshot) and then click on OK.
You have now successfully started your first archive! Feel free to archive instead of delete as keeping your records is quite important.
TIPS:
- VERY IMPORTANT – no password on the archive file.
- Keep archives small, for example – year by year. This is to prevent them from getting too big and slowing down your machine.
- With this way of archiving your folder structure stays the same thus making it easier to actually go back and find the files you are looking for from previous years.
For more information on various Outlook functions, please have a look at our self help site.
Argivering. Dit klink nie besonder prettig nie, né?
Ongelukkig kan ons elektroniese posbusse nie altyd byhou by die massa e-posse waarmee hulle daagliks gebombardeer word nie – veral daai groot video leêrs en prentjies …
As jy nie gereeld huis skoonmaak en onnodige of groot e-posse uitvee nie, gaan jy kort voor lank sonder enige spasie sit. Dis op hierdie punt wat argivering sy staal wys.
In hierdie kort artikeltjie sal ons vir jou wys hoe maklik dit is om argiewe op jou rekenaar te skep en onderhou.
- HOE OM JOU EIE ARGIEF-LEêR TE SKEP
Maak MS Outlook oop
- Kies die Home oortjie
- Gebruik die afrol-spyskaart langs New Items
- Kliek op More Items
- Kies Outlook data file
Hierdie aksies sal `n leêr vir jou nuwe argief skep.
Belangrik:
- Kies die regte benaming sodat daar nie verwarring is wanneer jy later nuwe argiewe skep nie.
- Moenie `n wagwoord op die argief plaas nie. Dit veroorsaak onnodige verwarring en verlies van e-pos wanneer jy `n nuwe rekenaar kry of data herwin moet word.
Dit moet ook onder “My Documents\Outlook Files” gestoor word.
Wanneer jy op OK kliek, sal jy teruggeneem word na die Outlook Home skerm.
Soos hier onder aangedui (wanneer die posbus oopgevou is), sal jy jou nuwe Outlook-argief sien.
2. NOU VIR DIE ARGIVERING
Kliek op File in die linkerkantse, boonste hoek.
Onder Info sal jy Cleanup Tools sien.
Wanneer jy op die opsie kliek, sal jy Archive as die derde opsie sien.
Die volgende sigbare een lyk soos die een hier onder.
Die belangrikste ding wat jy moet onthou is dat jy nagaan dat die regte argief-leêr gekies word vir argivering.
Om dit na te gaan, kliek op die browse-knoppie en maak seker dit wys na die korrekte leêr in “My Documents\Outlook Files”
Tweedens:
- Kies `n datum – alle e-posse voor die ingevoerde datum sal geargiveer word na jou leêr. Dit mag `n tydjie neem as jy nog nooit voorheen geargiveer het nie.
Thirdly:
- Kies jou posbus (nie net dele daarvan nie, maar gebruik die oopgevoude sig soos in die voorbeeld) en kliek op OK.
Jy het nou jou eerste suksesvolle argief geskep. Argiveer gerus jou e-posse eerder as om dit uit te vee – dis soms belangrik om rekords te behou.
WENKE:
- BAIE BELANGRIK – geen wagwoord op jou argief-leêr nie.
- Hou argiewe klein – byvoorbeeld jaar-vir-jaar. Dit voorkom dat argiewe te groot raak en jou rekenaar stadig maak.
- Deur op bogenoemde wyse te argiveer bly jou leêrstruktuur altyd dieselfde en is dit makliker om heen en weer te soek na e-posse van vorige jare.
Vir meer informasie op ander Outlook-funksies, gaan kyk gerus op ons selfhelp webwerf.
