Introduction
This case study was performed to demonstrate how routine X-ray CT inspection adds value to medical implant production, ensuring quality and reliability. This particular case is for 3D printed (additively manufactured) titanium hip and knee implants but the methodology is applicable to all manufacturing techniques, not only additively manufactured implants.
X-ray CT inspection is relatively expensive compared to older inspection methods, but is significantly better as it allows entirely new insights and streamlined workflows, saving costs long-term and providing higher reliability in inspections – which is ultimately better for the patient. This case study aims to show that the costs are not excessive, and is based on current costs for CT inspection services at the Stellenbosch CT facility, which is a relatively low-cost service facility compared to international X-ray CT inspection services. This is an example of a relatively routine inspection – for special cases such as higher resolution requirements, denser metals, or specialized scan parameters, the costs can be higher. In some cases costs can be lowered for simpler inspections, simple samples and easy-to-detect features. This case study is a typical workflow and a good indication of costs – especially for new users of the technology.
Implant samples
Two samples were provided by Executive Engineering (www.execeng.co.za), who produce these parts under contract for LRS implants (https://www.lrsimplants.com/). Both these companies gave approval for the release of this case study. Executive Engineering is a local company on the outskirts of Cape Town which has a newly established metal additive manufacturing facility, with an EOS M290 currently running only Ti6Al4V. LRS implants specialize in design and production of custom medical implants.
The two parts are biomedical titanium alloy Ti6Al4V (ELI) material and are parts of hip and knee joint implants. They are shown in Figure 1. Lattice regions are included to improve long term bone-in-growth and attachment. Both parts were scanned at typical parameters used for this material, at resolution defined by the sample size. For more on scan parameters and optimization, please refer to the references or contact us for more information.
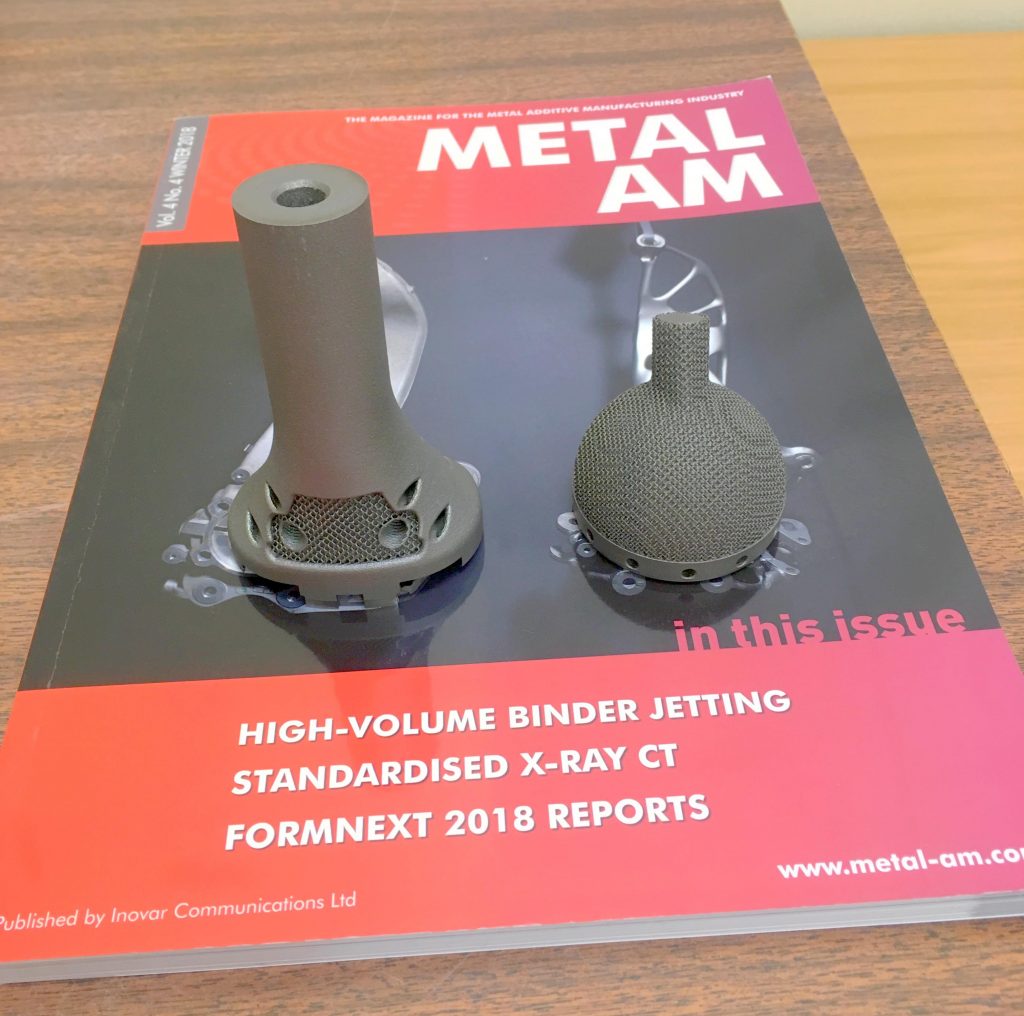
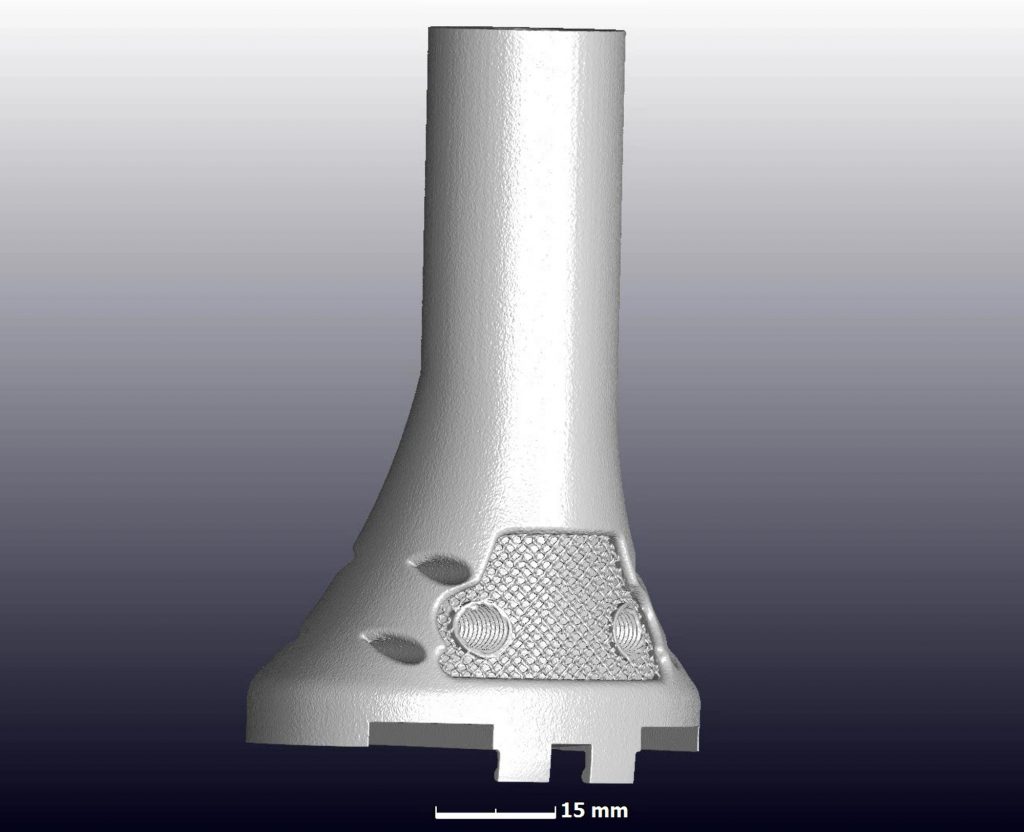
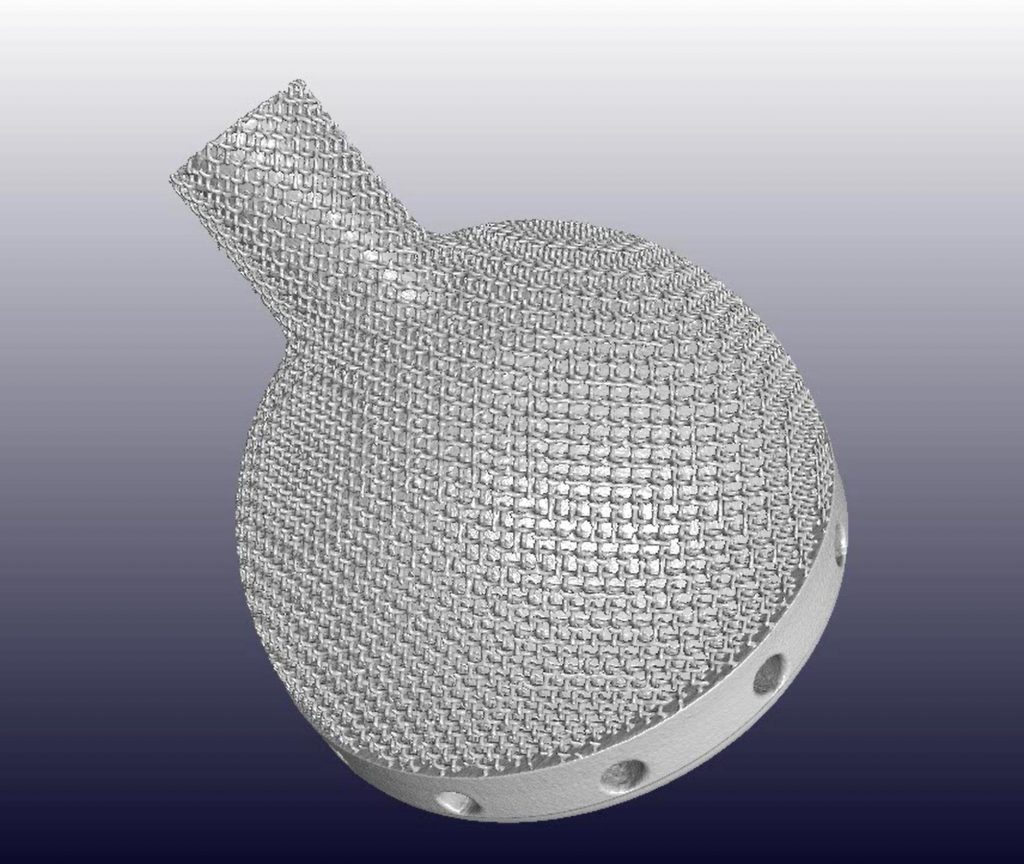
Figure 1: The implants – photograph with magazine for scale and 3D X-ray CT images
What results do we get?
X-ray CT is a technique that has many capabilities – it can be used for many things. Obviously when you want to do everything – it costs the most. We break it down into different levels, you might only want one of these, but we demo everything here. The first level, which could be called manual CT inspection, is the simplest and lowest cost. This involves simply checking the part in virtual cross section images (called CT slice images). After scanning and basic data handling, the inspection is done by viewing cross-sectional images. This can be done by the user himself, requires no complex software tools and easily and clearly visualizes even small internal flaws which might be problematic. An even simpler way to do this is to view a slice video, see here for videos of both implants – also shown in Figure 2 in different slice views of both implants. In these images, everything in the white line (all white and grey areas) is metal, and black is air. In this part no unexpected cracks or flaws were found. For examples of porosity, cracks or flaws please see this case study of a few years back – for a cast metal part. Major flaws would be in the form of dark black areas and lines in the white material, which are not present here.
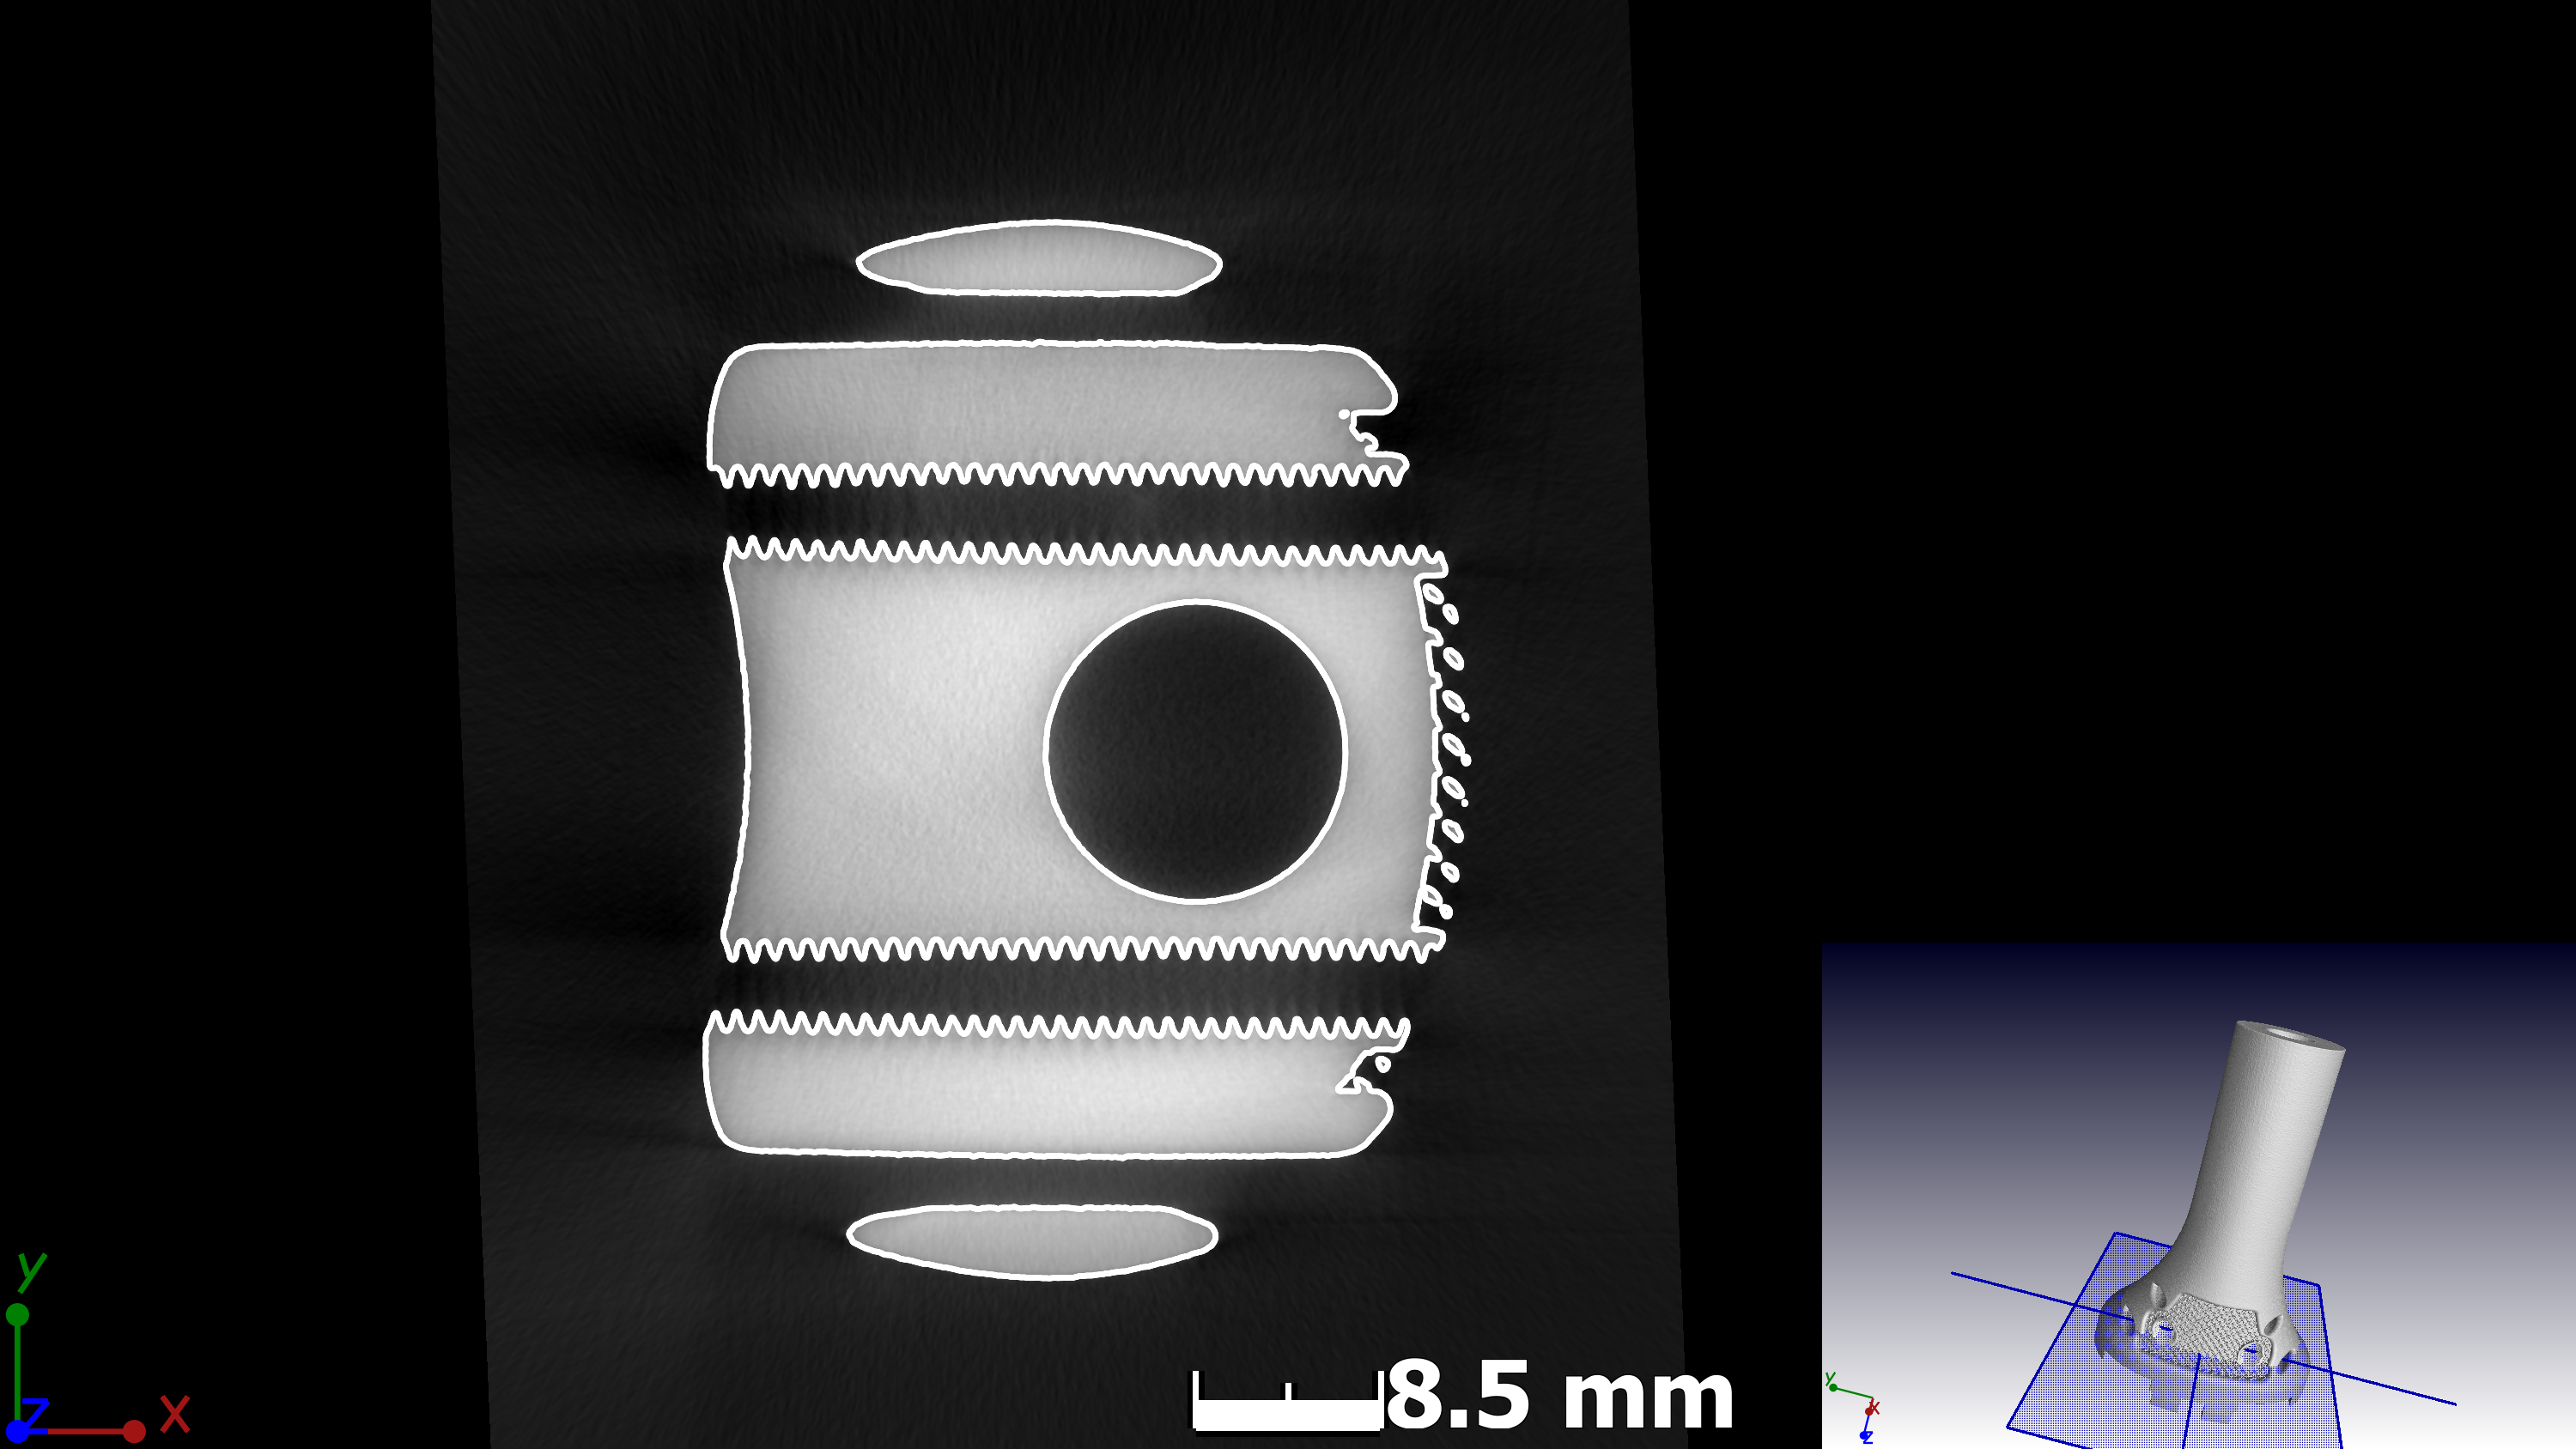
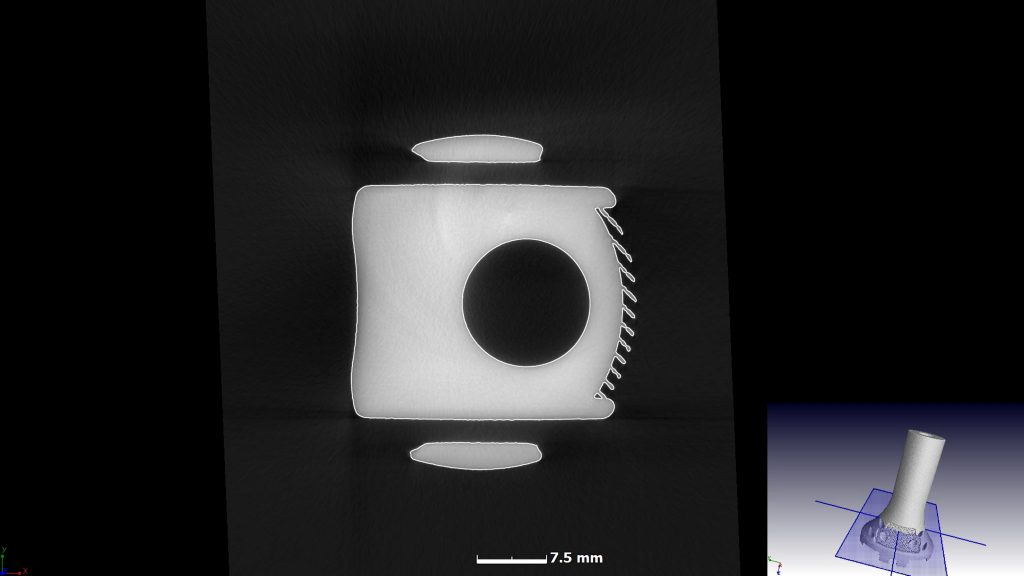
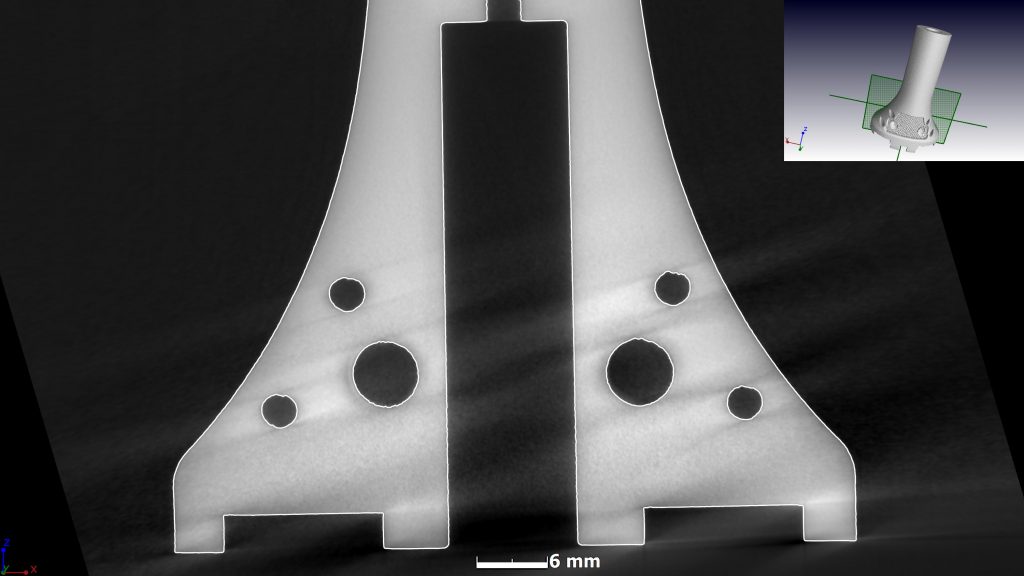
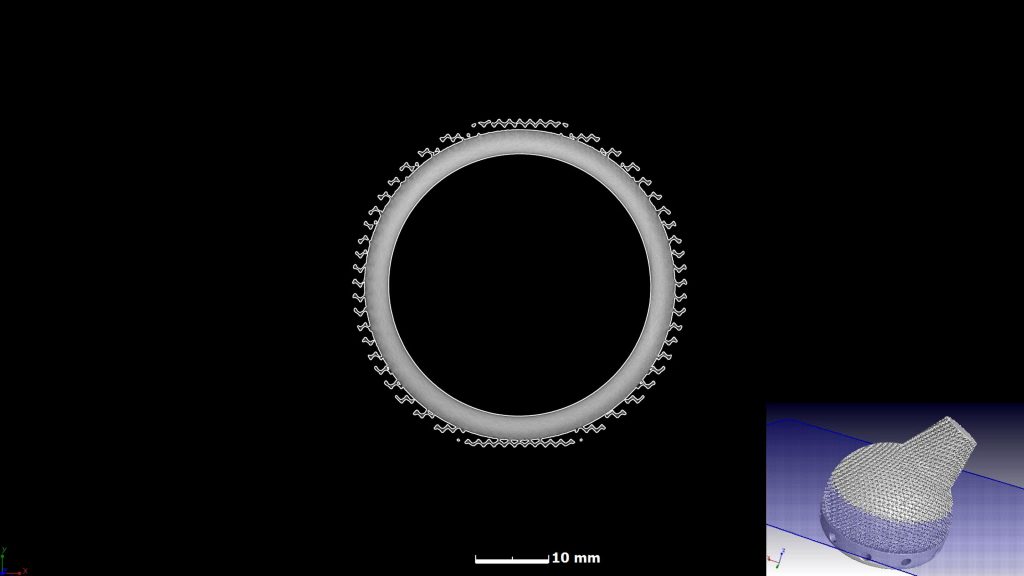
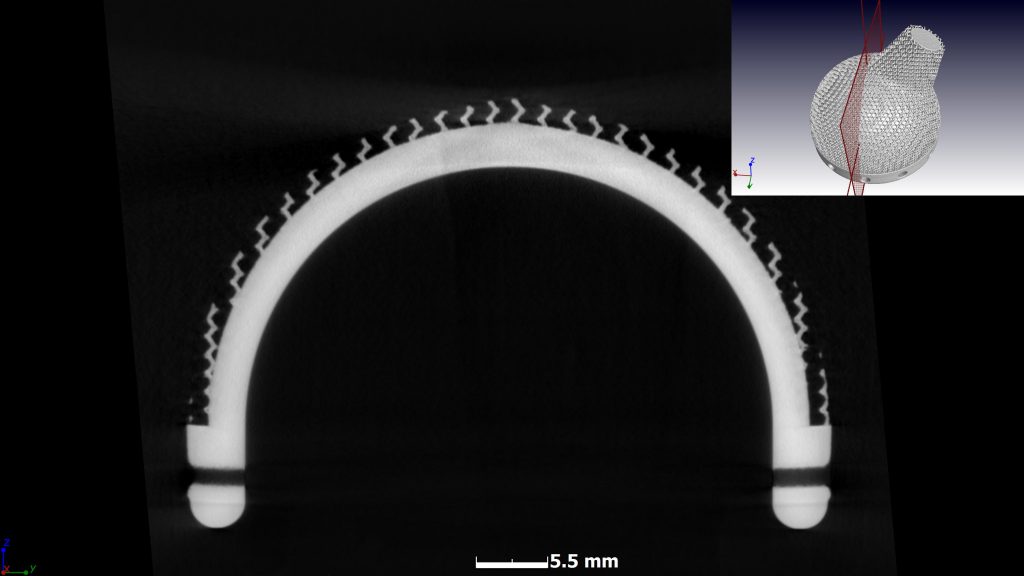
Figure 2: CT slice images showing no internal flaws – the inserts show the location of the virtual slice
Video of all slices from top to bottom – implant 1: slice video implant1 HD
Video of all slices from top to bottom – implant 2: slice video implant2 HD
Manual inspection requires a scan of high quality, and basic data handling to generate clear well-contrasted slice images. Usually we the CT service provider highlights “indications” – areas of potential flaws. This can also be handled by the customer himself, either with slice image stacks, video or full data with free 3D viewer program. This program is called Volume Graphics myVGL and is freely available for all data handled by Volume Graphics VGSTUDIO MAX 3.2, which is also the software used for this case study. Videos on how to use this is available here. For the scan + basic data handling, the cost is R2900 (international rate US$330). This provides clear insight into the presence of flaws and is suitable for all parts (as the method is entirely non-destructive) or can be applied to selected samples from batches produced under identical conditions. This price is applicable to decent quality scans without special requirements, i.e. it is for typical implants of light metals, in the range roughly 50 – 150 mm in longest axis. Smaller or larger samples might require some variation of scan protocols which adds to the cost.
Besides using this method for checking to ensure all parts are flawless (and reject those that aren’t), it is also possible to use the method for calibration of systems and production process checking – using smaller test parts. This provides a fixed, documented result of the same test geometry analyzed the same way over time. This allows insight into the production quality and any progressive quality issues developing over a longer term. This is a topic which is highly applicable to all forms of manufacturing, but is especially useful for additive manufacturing where many factors can affect the quality of the final product.
A quantitative defect analysis function allows colour coding of pores inside the part, when this is found. This is an extra R1450 (international $165), but in this case no such flaws where found. This method is particularly useful when testing small coupon samples for optimizing the production process, ie. when improper settings cause some porosity or flaws. The advantage of a quantitative 3D colour coding of defects is the ability to understand the 3D shape and distribution of the flaws relative to the part features (e.g. near critical areas, or showing what the cause of the problem is, to more easily and faster fix this problem).
For this case study, the next level of insight is the use of the same scan data for metrology – that means accurate dimensional measurement, often done traditionally with coordinate measurement machines (CMMs). The accurate surface determination allows various selected dimensional measurements such as diameter of critical cylindrical cavities shown for the part in Figure 3. In addition the STL file data can be exported, or preset dimensional analysis can be performed on batches of parts with accept/reject criteria. For typical CMM measurements of up to 10 features, the additional cost is R1450 ($165 international). For batches of similar parts more measurements can be preset and run automatically for the same price.
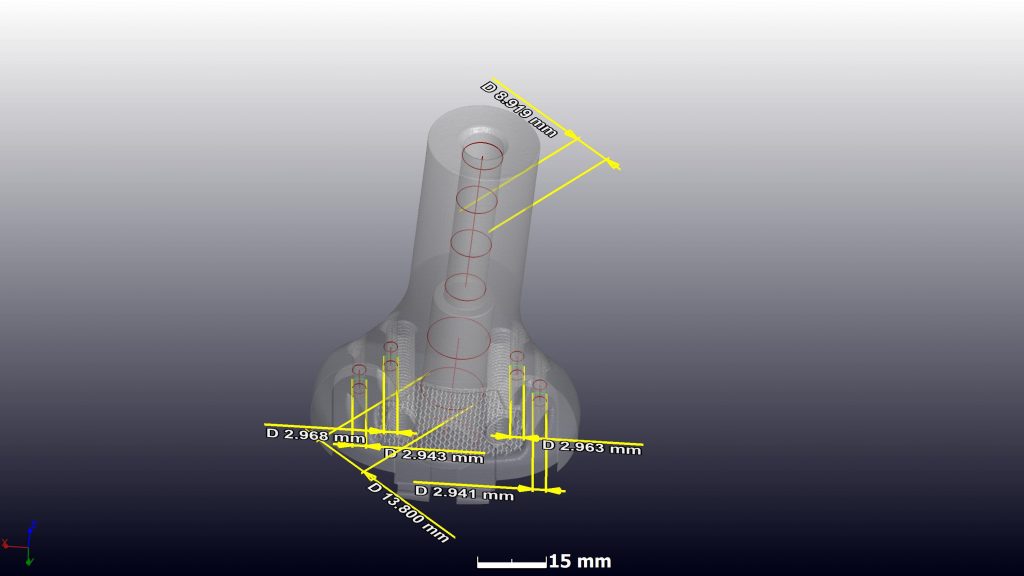
Figure 3: X-ray CT is also a coordinate measurement machine, without limits on complex geometry or accessible points
The next level, also costing the same (R1450 or international clients $165), is comparing the actual produced part with its CAD design file, to see where large deviations occur. The implant is shown in Figure 4, with most of the part within 0.3 mm. The scan resolution here was 65 µm – and with good scan data up to 1/10th the voxel resolution can be used as the accuracy of the surface values. This means the surface data is likely 6.5 µm accurate, without any limits on hidden or complex features, or limits on surface finish which are sometimes issues with CMMs.
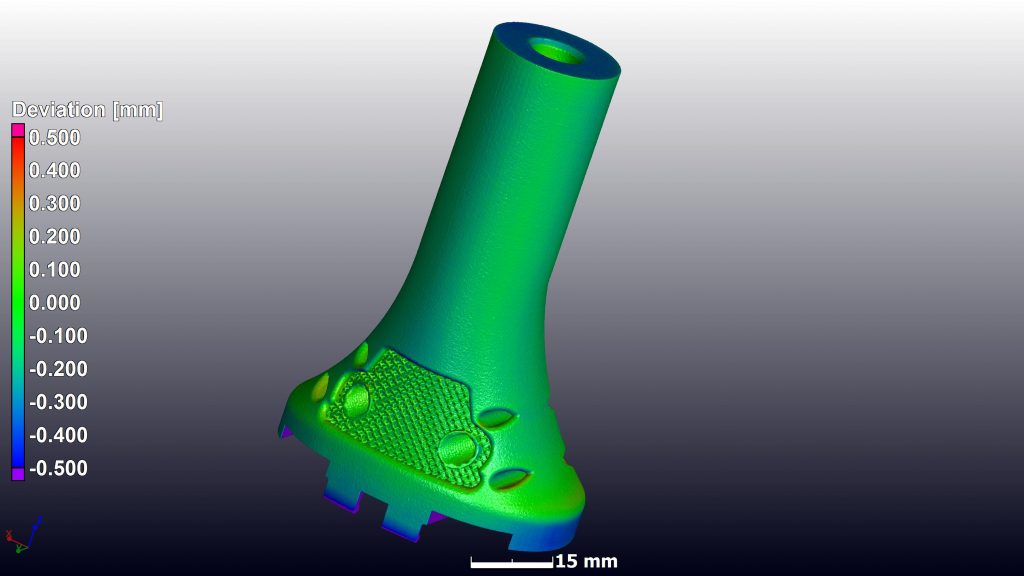
Figure 4: CAD variance analysis – showing most of the part is within 0.3 mm of the design file.
A useful additional tool is wall thickness analysis (you guessed it – additional R1450 or $165) – this method shows the thickness of walls of the part, mostly used for checking traditionally designed parts with parallel walls. It can also be used to visualize and check the thickness of very thin and complex areas such as lattice structures, as shown in Figure 5. Here most of the lattice is within 0.2-0.5 mm thick. The method used here is the sphere-method – the largest sphere that fits in the material at each point is reported as the wall thickness at that location.
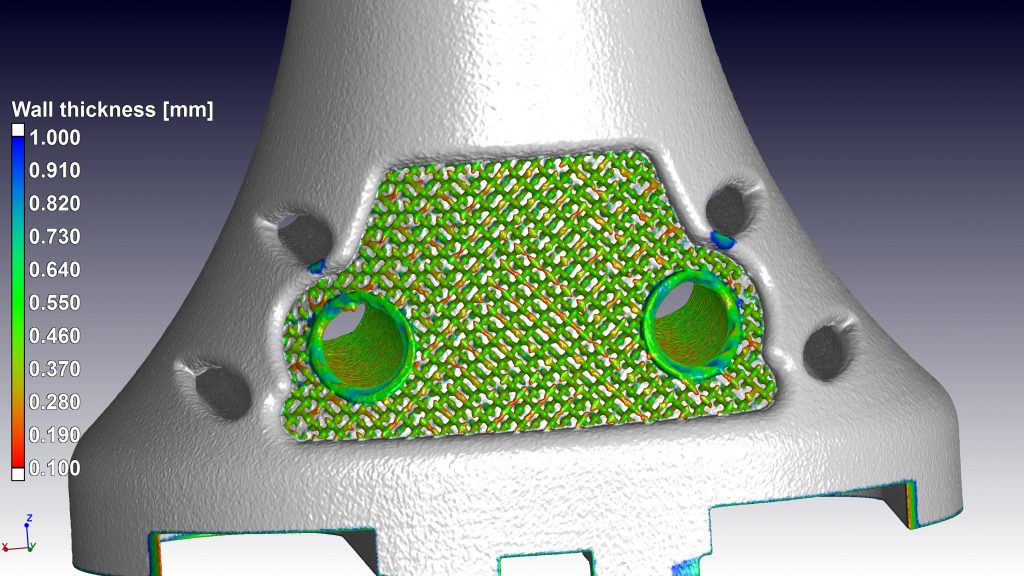
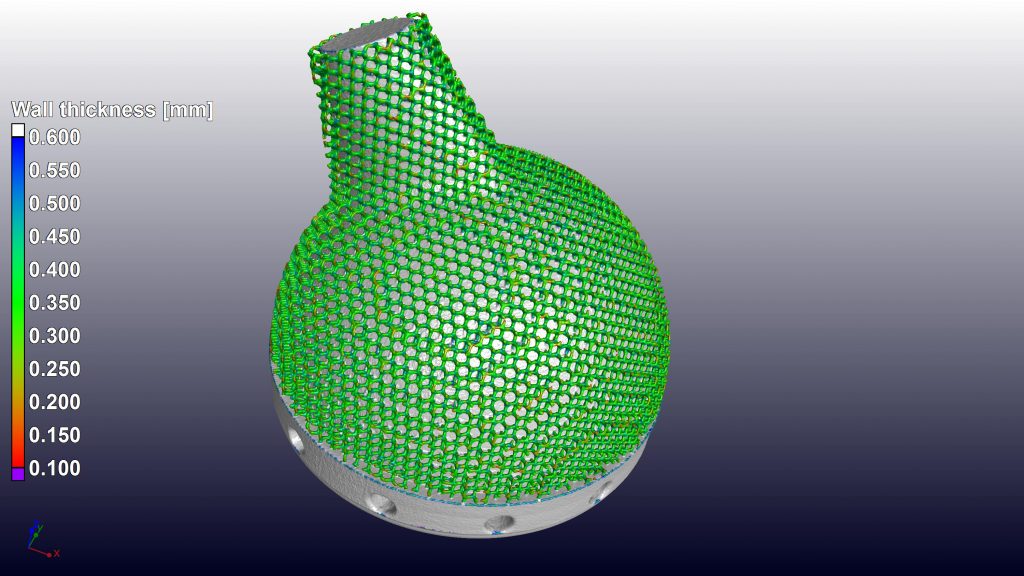
Figure 5: Wall thickness analysis applied to lattice areas showing local thickness of struts
So what are the limits and how to overcome them?
As with all methods, there are some limits. When materials unexpectedly contain high levels of dense inclusions or materials containing X-ray dense materials, this causes unwanted image streaks which make some analysis methods impossible. Often the presence of steel screws in parts with lighter metals have the same effect. Sample size is limited, and this is especially important when looking for small flaws – i.e. when there is a small flaw or crack and the resolution is not good enough, these may be missed. These and many other possible issues may lead to failed or inconclusive results. Some key points to ensure high quality CT inspections:
- Smaller samples provide better quality and resolution
- Scanning two or more parts at once provides worse quality and resolution
- Remove all screws or unnecessary material from the object of interest
- Understand the limits and the capabilities to get the most from the technique
Summary
Clearly X-ray CT inspection is a powerful tool for entirely non-destructive inspection of medical implants. We have demonstrated here the following levels of inspection, which are possible:
|
Description |
Cost
* Excludes 7% admin fee and VAT |
| 1 |
Manual CT slice inspection |
R2900 / $330 |
| 2 |
Defect analysis (quantitative) |
+R1450 / $165 (optional) |
| 3 |
Coordinate measurements |
+R1450 / $165 (optional) |
| 4 |
CAD variance |
+R1450 / $165 (optional) |
| 5 |
Wall thickness |
+R1450 / $165 (optional) |
This means that for one part, for an all-inclusive analysis of everything possible, it costs less than R10 000*. While this is more than traditional nondestructive testing (NDT) tools, the clarity and quantitative assessment allows to really improve the lives of patients, to clearly identify when even small flaws or manufacturing errors are found in parts. On the other hand, even the first-level of analysis is useful for this purpose, bringing the cost down by almost 70%. Further cost reduction might be in optimizing and calibrating the production process itself using CT on a regular basis and not inspecting all parts produced. Any way you look at it, the insight into implants with 3D X-rays is clearly value for money. If you are not yet convinced, have a look at this video which summarizes all the above: medical implant scan small_version
This case study was made possible with cooperation from Executive Engineering & LRS implants. Scans were performed at Stellenbosch CT facility and visualization and analysis performed with VGSTUDIO MAX 3.2.
